
What you need to follow this guide
- Python 3 installed on your computer
- A basic understanding of how to use the command line (the terminal)
Let's get started!
Create a project directory
We’ll start off by creating the project directory and enter it.
mkdir my-first-flask-app && cd my-first-flask-appCreate a virtual environment
A virtual environment creates a separate container for your project. This let's you install
Python libraries that are meant for the specific project only and nothing else, meaning that you can have different versions of for example
Python installed in different environments without them being affected by each other.
To create your virtual environment you need to launch Python 3.x version and instruct it to run the built in module venv. run the following:
In your project directory you should now have a folder named myvirtualenvironment which contains the files needed for your virtual environment to work.
Time to activate your virtual environment. run the following:
You should now see something similar to the below in your terminal:
Install Flask and get your app up and running
-
To install Flask run:
pip install Flask -
When Flask is installed, create a python file in your project directory:
touch app.py -
Open the file
app.pyin your preferred code editor and add the code below. Save the file.
-
To run your app you need to let Flask know which file to use. Run the following:
-
Let’s start Flask!
flask runYou should now see the below in your terminal:
$ flask run * Environment: production WARNING: This is a development server. Do not use it in a production deployment. Use a production WSGI instead. * Debug mode: off * Running on http://127.0.0.1:5000/ (Press CTRL+C to quit) -
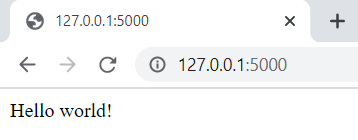
Go to http://127.0.0.1:5000 (the URL for your localhost on port 5000) in your browser and you should see the message “Hello world!” !
If you check your terminal again it should have updated with the call from the browser to your Flask app as below, 200 = success:
127.0.0.1 - - [07/Oct/2020 09:36:30] "GET / HTTP/1.1" 200 -You may also see another call for the favicon with the code 404 which is totally OK since you haven’t added a favicon to your app yet.
127.0.0.1 - - [07/Oct/2020 09:36:32] "GET /favicon.ico HTTP/1.1" 404 - -
To make the continued development of your app easier you can make Flask automatically update when you make changes to your code by setting the environment to development. You can also get debug messages if something’s not working properly.
To enable these features you first need to stop your app by hitting
Ctrl+C. Then you need to run the following:When you start your Flask app up again you should see the below in your terminal:
$ flask run
* Serving Flask app "app.py" (lazy loading)
* Environment: production
WARNING: This is a development server.
Do not use it in a production deployment.
Use a production WSGI instead.
* Debug mode: on
* Restarting with stat
* Debugger is active!
* Debugger PIN: 123-456-789
* Running on http://127.0.0.1:5000/ (Press CTRL+C to quit)
There you have it, your first Flask app, well done! 🌟
Where to go from here
There’s so much you can do with your new Flask app. Here are a couple of great tutorials to get a kick start 🚀
In case you bump into any problems, or have suggestions, you’re more than welcome to contact us - we’re happy to help!


