What is a Shopify app? - It’s basically an interface into the Shopify environment which allows you to manage you shop data. You could also call it a “plugin” if you want. You can learn more about Shopify apps on their getting started page.
Why should I create a Shopify app with 46elks? - You might for instance want to send SMS to your customers about shipments and order updates. Maybe you are having a campaign and want to advertise your products or services. Why not lower the barrier for your customers and allow them to order products via SMS? All this is possible.
Getting started
- Create a Shopify developer account.
- Create a new store (do steps 1-4 and 8).
- Add one or more products.
- Create one or more test orders.
- Ensure you have a domain and a server to upload your files into.
Please note that your developer account and your store are two separate accounts. Keep that in mind as some parts of the tutorial might be confusing otherwise.
Create your Shopify app
Let's begin with creating the app so that we have something to work with.
Login to your developer account.
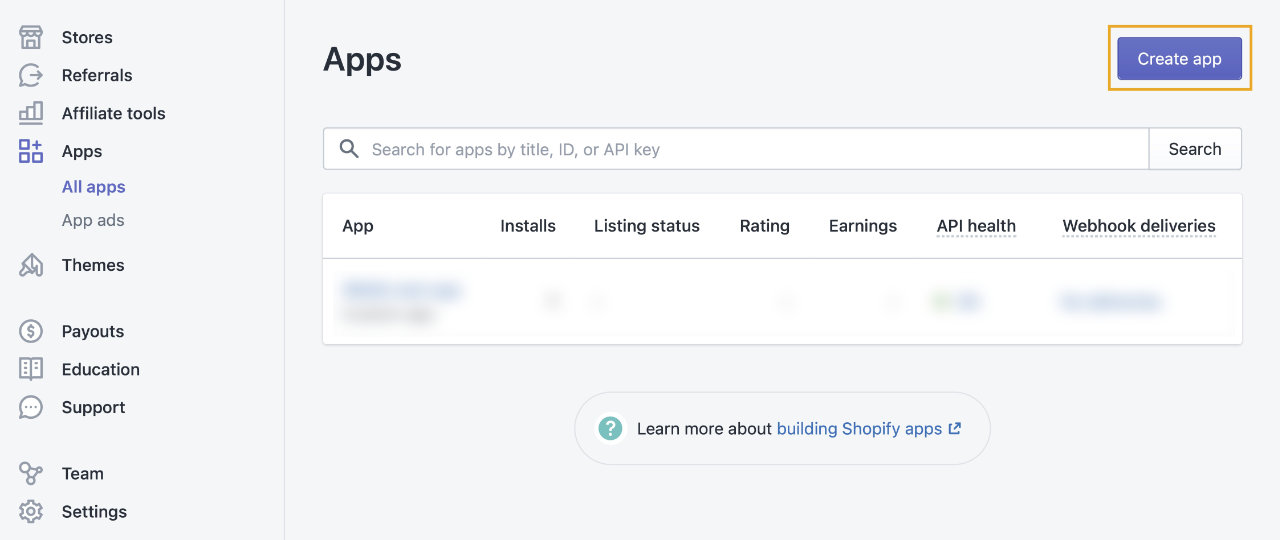
From the dashboard, click on ”apps” in the left navigation panel.

On the next page, click "Create app"
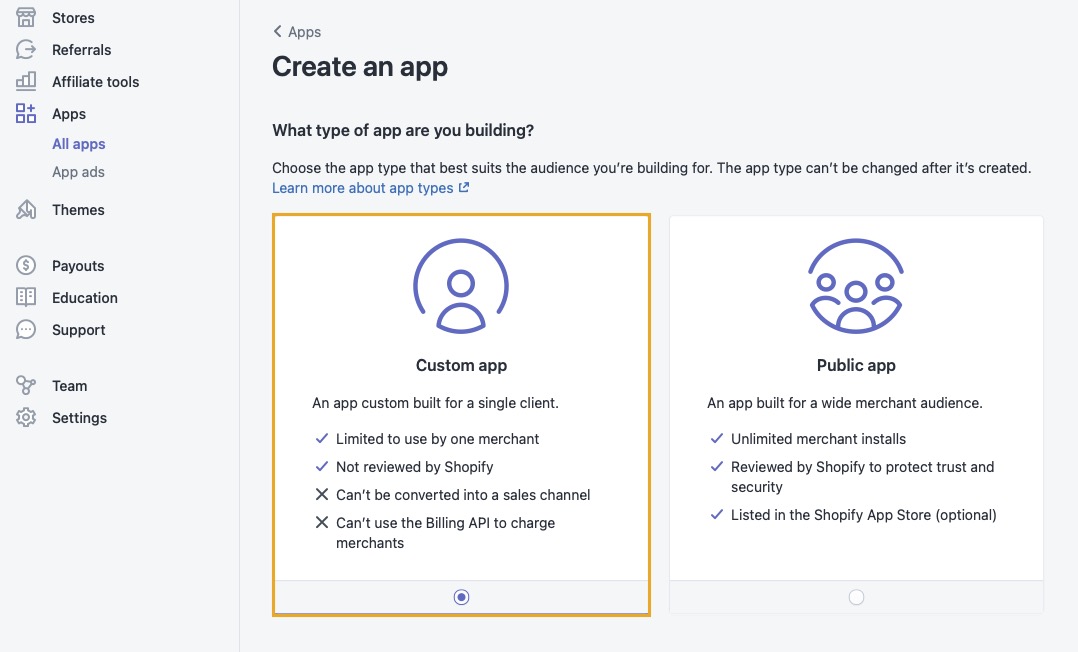
Now select ”Custom app”
Fill out the form with information about your app.
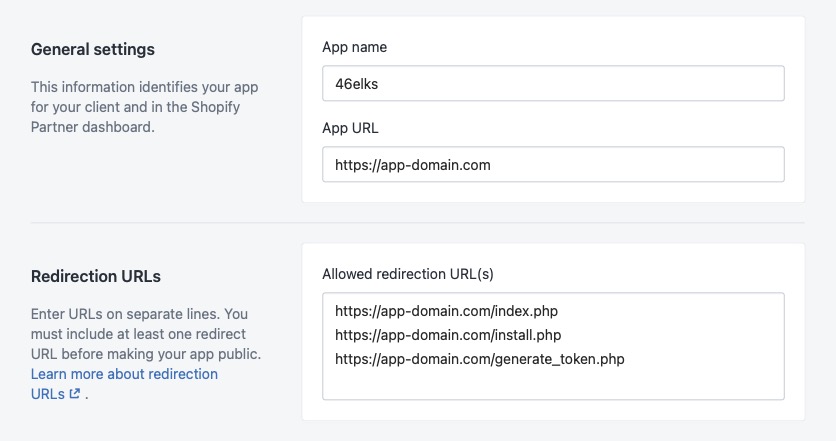
app name – The name of your application. You can call it whatever you want.
app URL – The URL of the domain where you are going to upload the Shopify app files later on. Here we use “app-domain.com" as an example.
Whitelisted Redirection URL(s) - Copy and paste the following three lines and change app-domain.com to your own app domain.
Click Create app at the top of the page
Please note that “Custom app” is only suitable if you are building something for yourself or for a single merchant (which we will do in this tutorial).
If you want your app to be accessible for multiple merchants you must select “Public app”.
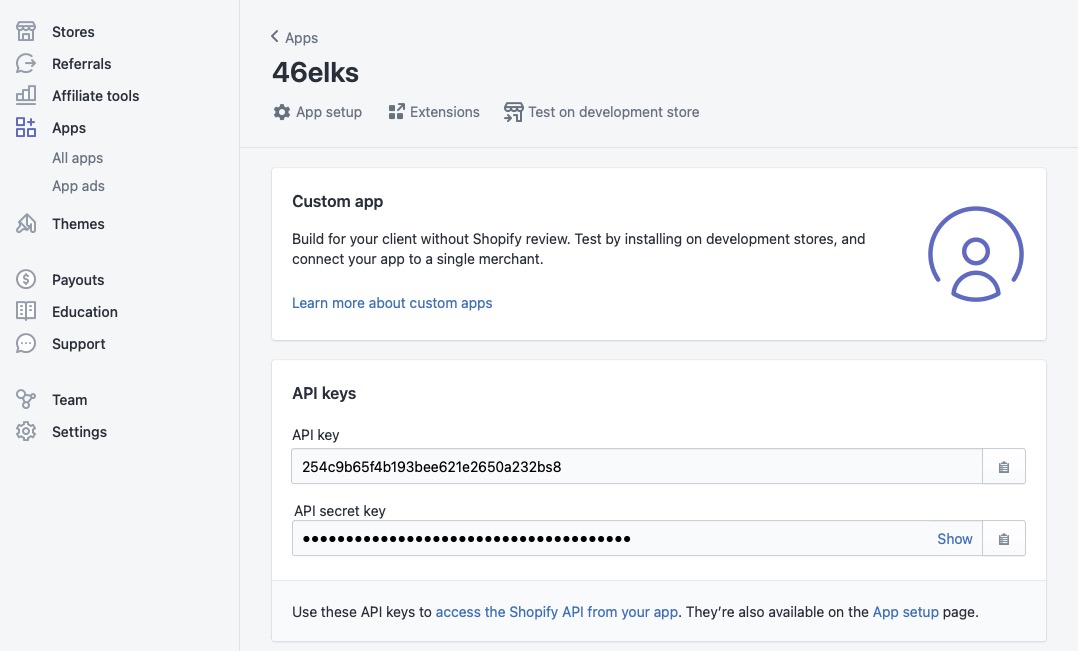
Your Shopify app is now created! You'll be redirected to your app dashboard and there you'll find your API keys which you are going to need in a later step.
Install your app
In the previous step we created a container for our new app and right now we can't do much with it. We need to install it into our store to get a Shopify access token, only then we can begin implementing the logic and retrieve data.
Let's start with downloading the source code we are going to use. (The code is created by the Shopify developer Alex Markov).
Open the file "install.php". It looks something like this:
Set
$scopestoread_orders, write_products, write_orders.These determine what our app is able to do within our store. You can add and subtract to the list to suit your need. A full list of available scopes and what they do can be found on Admin API access scopes.
Set
$api_keyto the API Key you have been assigned (you'll find it in the app dashboard as shown after you installed your app).In
$redirect_urichange "app-domain.com" to your own domain.Save the changes.
Open the file "generate_token.php". It sholud have the following code:
Set
$api_keyto the API Key you have been assigned (same as in step 4).Set
$shared_secretto your API secret which can be found in your app dashboard. (It’s called “API secret key” in the dashboard).Save the changes.
Upload all the files to your app domain.
Now that the code is in place we are ready to actually install our app within our store. We'll use a special link that looks something like this:https://app-domain.com/install.php?shop=mystore.
Change
app-domain.comto your own domain.Change
mystoreto your own Shopify store name.Open the link in your browser and you'll be redirected to the installation page.
Click "Install app".
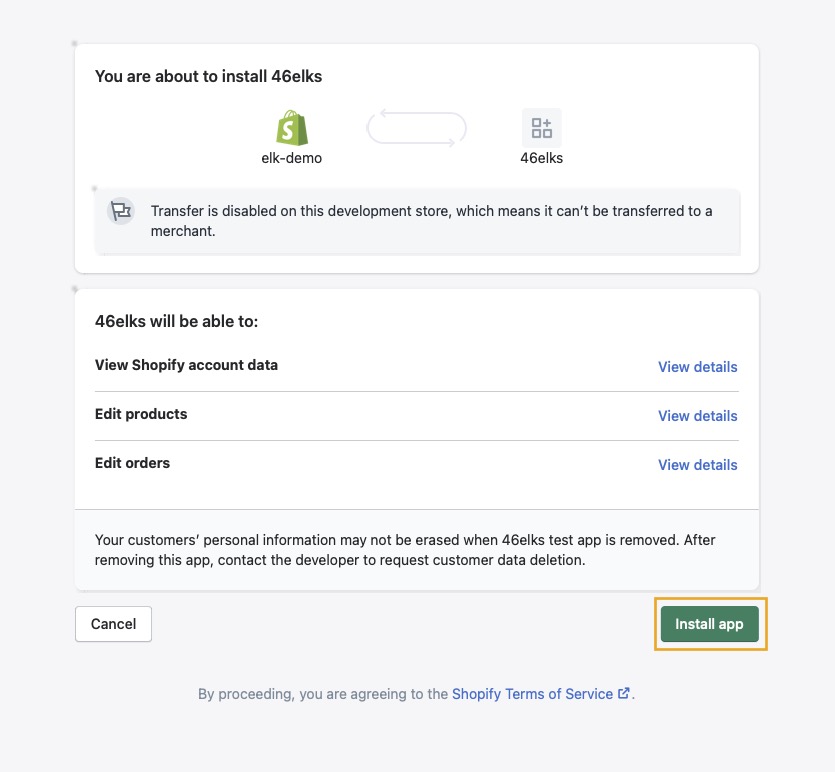
If you are unable to install the app, please confirm that you are signed in to your store and try again.
After you've installed your app you'll get your Shopify token. Save it, you'll need it later.
Add some logic into your app
In the previous step we installed our app and right now it’s only an empty container. Let’s put some logic into it.
Once we’ve added the code below we'll be able to get all data about the ordered products.
Create a new file called "index.php" and insert the following code into it:
Set
$tokento the Shopify token you got after installing the app.Set
$shopto your store name.Upload the "index.php" file to your domain.
Now we are going to test the app within our store.
Login to your Shopify store.
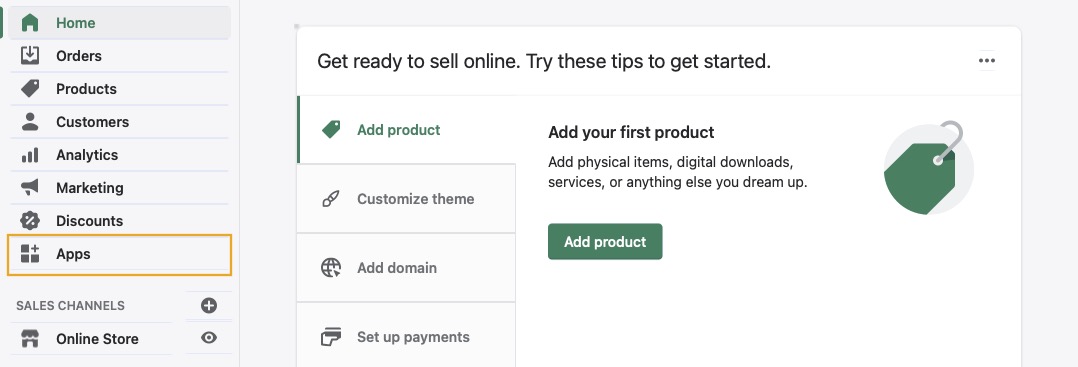
Go to your store dashboard and click on "apps" in the left sidebar.
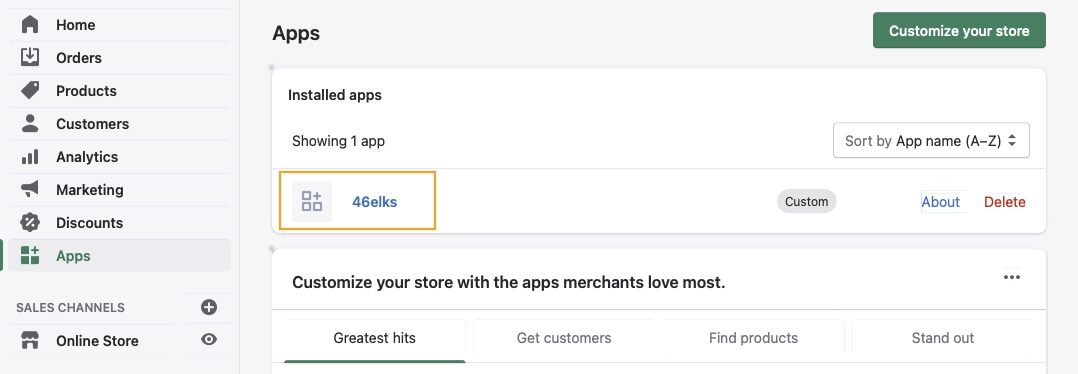
Click on your app's name in the list you are presented with.
Now you should see information regarding the orders.
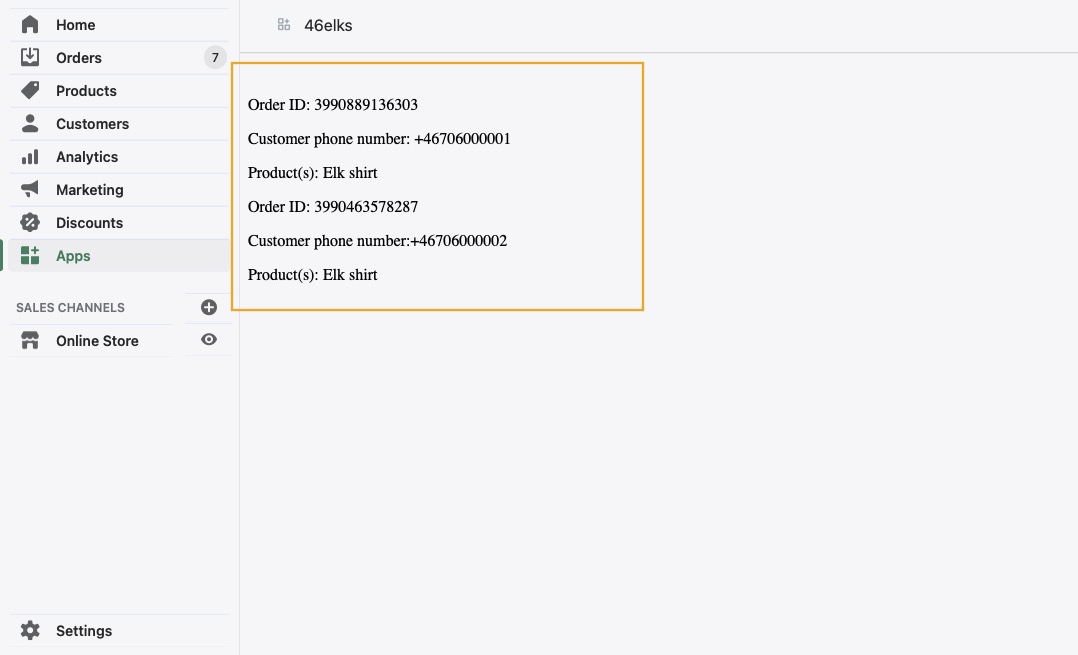
Please check out the Shopify API to see what else you can do. In the above example we used the order API.
Implement SMS features
The last thing we are going to do is implementing the SMS feature. There are many possibilities for how you can use SMS in your store. Here we are going to implement a feature which allows the customers to order a product.
Please note that the following code is just an example to get you started. It's not a plug-and-play solution. You'll need to enhance it to suit your needs. In the example below we will send a POST request to the order API.
Create a new file called "new-order.php" and add the following code into it:
Set
$tokento your Shopify token.Set
$shopto your store name.Save your changes and upload the file to your app domain.
Now, to receive incoming orders via SMS you'll need a special number and connect that number to the script we just created. This is done in three simple steps:
Create a 46elks account.
Allocate a virtual number.
Configure sms url on your virtual number and set it to
https://app-domain.com/new-orders.php(change app-domain.com to your own domain)
You are done! You customers can now send an SMS to your virtual number with the variant ID of your product and you'll see the order being created in you admin panel.
Now that you know the basics of how to create a Shopify app and integrate it with 46elks, you could also try to implement a feature to send SMS to your customers.
Happy coding! 🥳


