
What you will accomplish:
Every Saturday morning at 8am an SMS is automatically sent to all gym members with a link to a schedule of the coming week’s class schedule.
What you need to follow this guide
- A 46elks account.
- Access to your Websupport dashboard.
Steps
Create a PHP file that sends SMS
This PHP file sends a preset message to a defined list of recipients. In your code editor, create a php file and copy the code so it looks like the example below, except with your 46elks authorization details where indicated by comments
Parts of a cron command
It is good to have an overview of cron before we dive in to our example. Below is a brief overview of cron commands and how they work (skip ahead here). Here is a simple cron job example:
There are two main components of a cron job:
First, the timing: 10 * * * * - here you set the minutes, hours, days, months, and weekday settings (more below).
Second, the command itself:
The command itself in this example has three parts:
/usr/bin/php - PHP scripts are usually are executable by themselves which is why we need
to run it through the PHP parser. You can use the command which php to check the correct path.
/www/virtual/username/cron.php - This is just the path to the script.
> /dev/null 2>&1 - (optional) This part is handling the output of the script.
In the above example, the cron job is set to send every 10 minutes - or more specifically, every 10th minute of every hour of every day of every month, every day of the week. An asterisk is a wildcard that stands for 'all'.
Here is a break down of the timing elements:
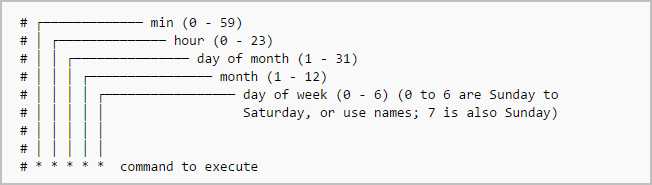
Here are a few basic examples to get an idea of how it works:
| Syntax | Explanation |
|---|---|
0 * * * * |
Run once an hour (every hour at minute zero) |
0 0 * * * |
Run once a day (every day at midnight and minute zero) |
0 0 1 * * |
Run once a month (on the first day of every month at midnight and minute zero) |
If all else fails, crontab.guru is an excellent resource.
Setting up our cronjob on Websupport
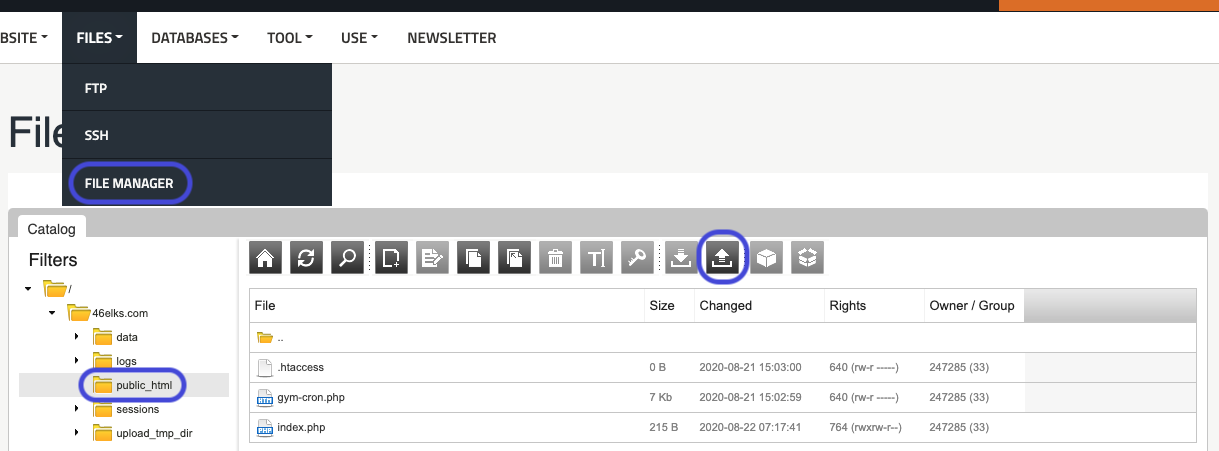
Step 1 - Access the file manager
Log into your Websupport account and navigate to the 'file manager' through the 'files' tab. Once here, navigate to your websites public_html folder and select the upload symbol.
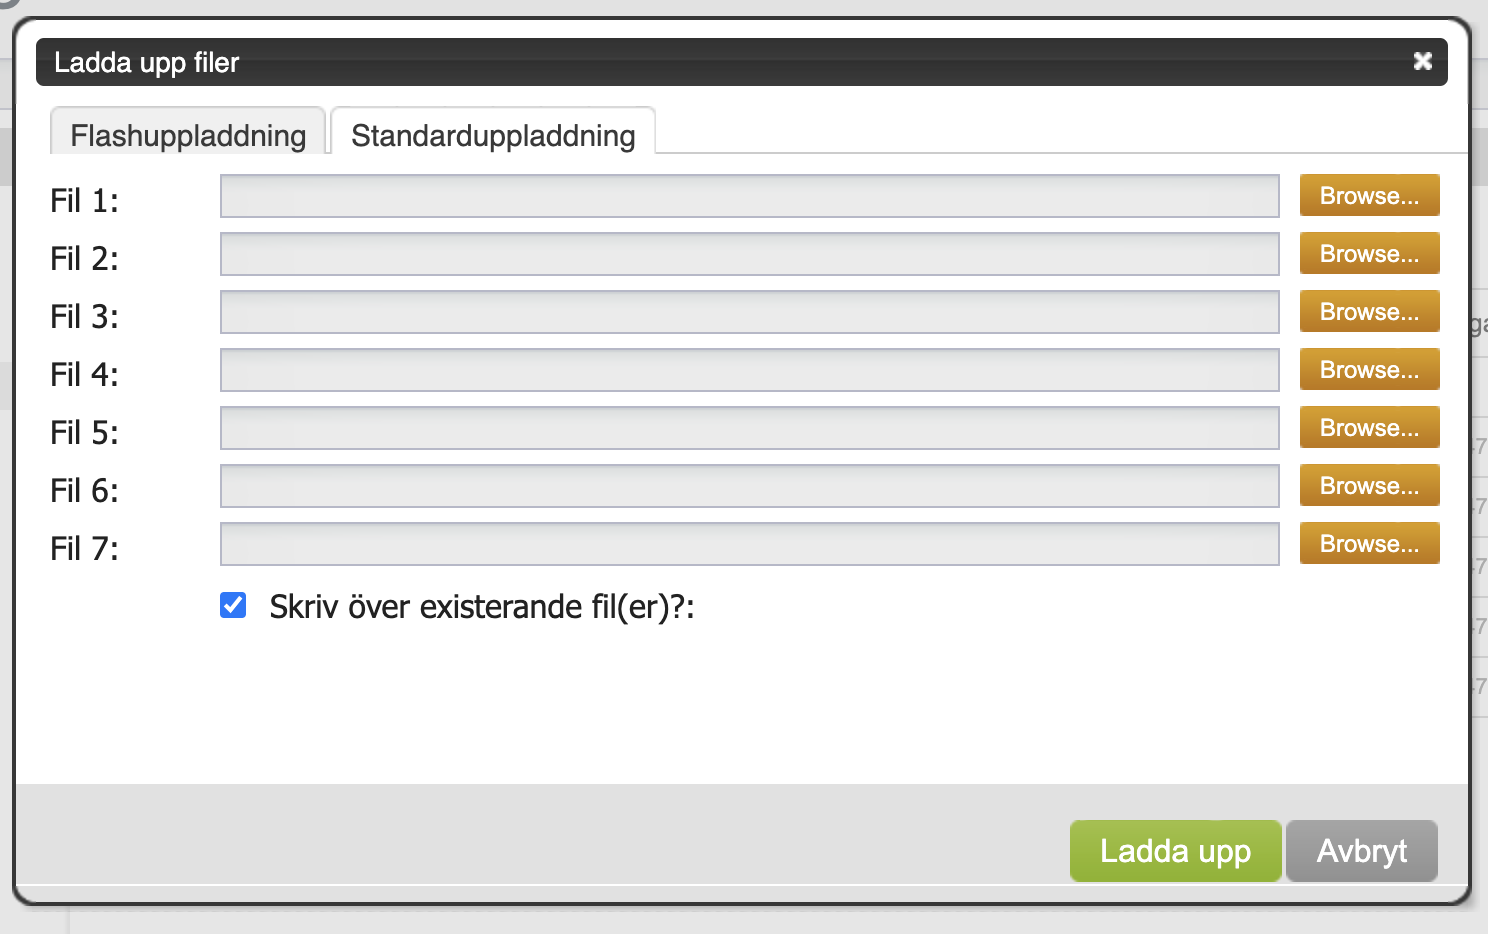
Step 2 - Upload your PHP file
Find your php file with 'browse' and once selected click 'upload'.
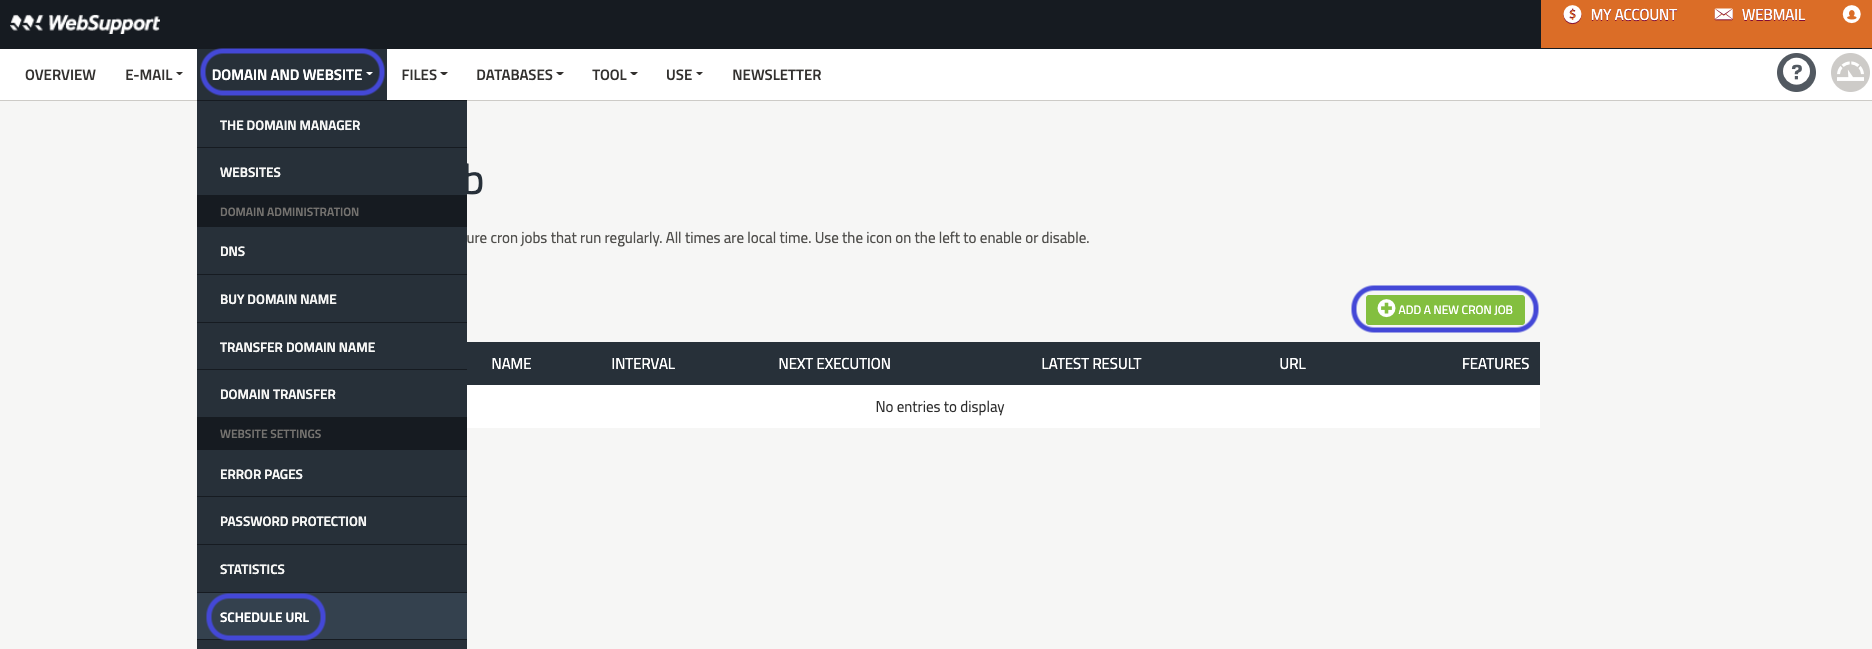
Step 3 - Access the scheduling tool
Now navigate to 'Schedule URL' which is located under the tab in the top bar. Once here, click 'Add a new cron job'.
Step 4 - Add your cron job
Fill out the form according to the specifications you wish. You can see an example of the format of the URL which should be changed to match your specifications. Click 'Add' and your ready to test! 🚀
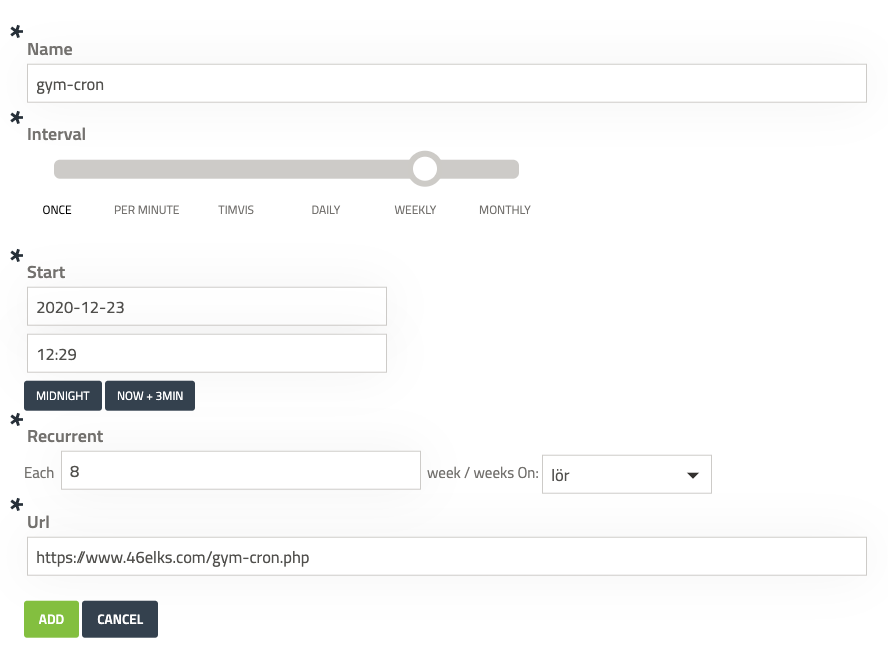
For testing purposes you can set a time closer to when you are following this tutorial so you know it executes correctly.
Some other potential use-cases for cron jobs
- Sending our reminders and updates to your staff or customers
- Checking the status of your servers and website and notifying your support team
- Requesting monthly feedback from your team
- Checking your database for unpaid bills and sending notices
- Sending yourself weekly SMS updates on your investments
Written 2020-12-18 by Ben Chatwin.


