- Create a 46elks account.
- A virtual number
Because you’re here you’ve received a phone number for free on your account that you can use freely for two years. You can see your number here.
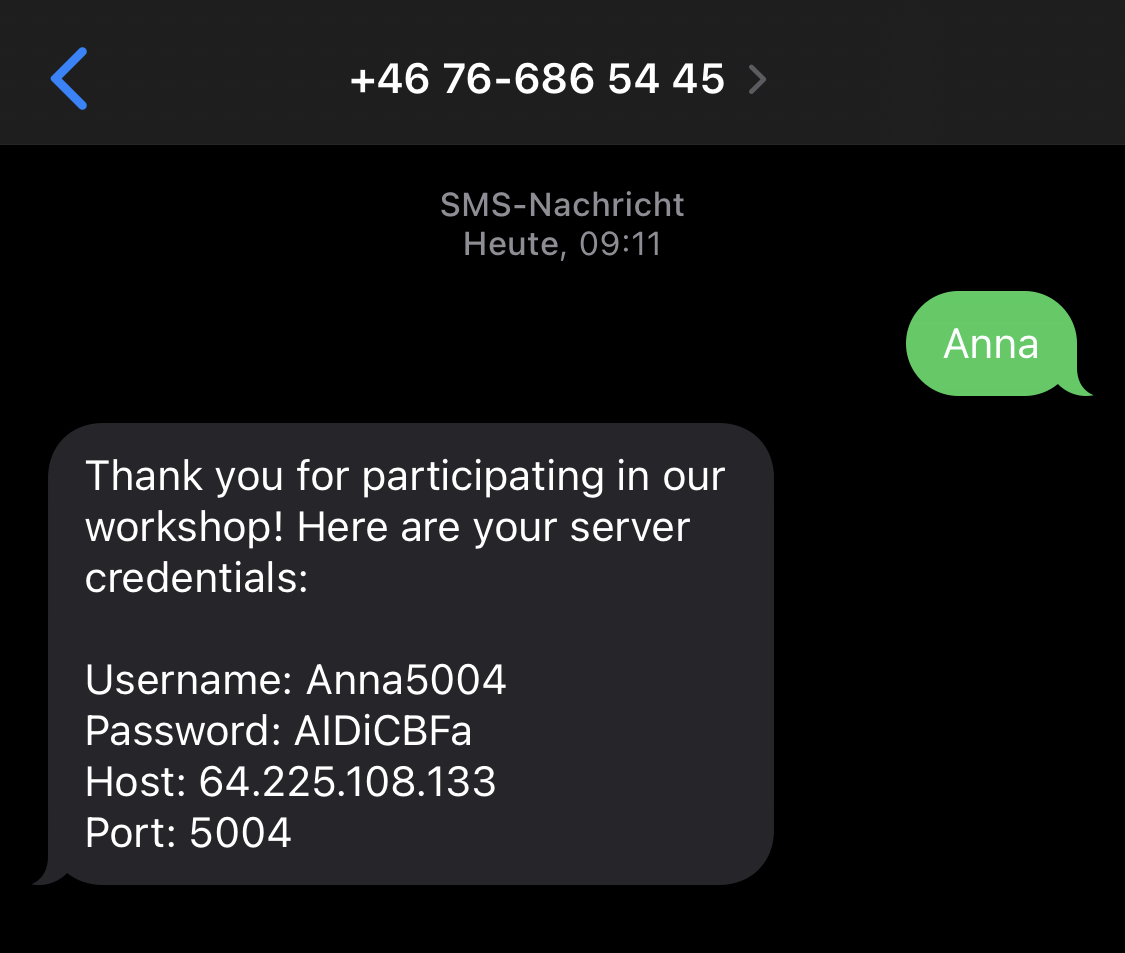
Can't see a number? Ask an elk and we'll help! - A live server to run your code on. Text your first name to +46766865445 to get an account on our live server.
Be patient with yourself and others. We'll help each other out!
What we're doing today
- Access production server
- Set up Python & Flask
- Set up your own switchboard
- Modify your virtual number
-
Login to the production server.
Changeusernameto your own username on the server.
Use the password from the SMS -
mkdir switchboard
-
cd switchboard
-
Set up virtualenv
$ python3 -m venv venv
$ . venv/bin/activate
$ pip install requests
$ pip install Flask
$ pip install Flask-APScheduler
-
vim app.py
-
Import Flask and name it
-
Define our url and change this
your_port_numberto your port number -
Set up new route
-
ESC + :wq
(How to exit in Vim. Yes, it's possible) -
Run your Flask app.
Replaceyour_port_numwith your own port numberTo stop Flask run
CTRL+C -
Visit your Flask app
Replaceyour_port_numwith your own port number -
The set up works, now let’s code the switchboard ☎️
-
In your app.py import json and flask request
-
- The API expects a json with details about what to do with the incoming call
Let’s check out the documentation to see what that looks like…
Docs → PHONE CALLS → connect -
{"connect": "+46700000046"} -
Change the route to accept incoming calls
-
Change the route to accept incoming calls
-
We need to connect the call to one of the users in our users.txt
-
Then your code will look like this in full
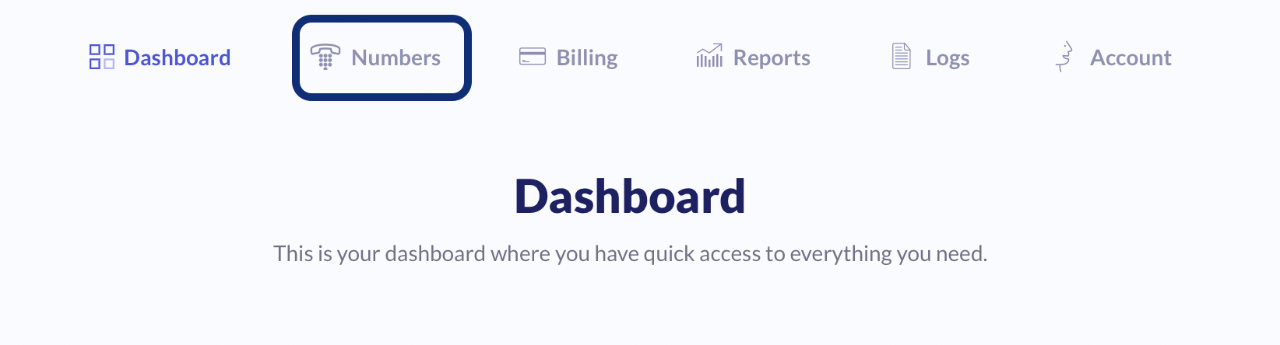
- Log in to your 46elks account.
- Click numbers.
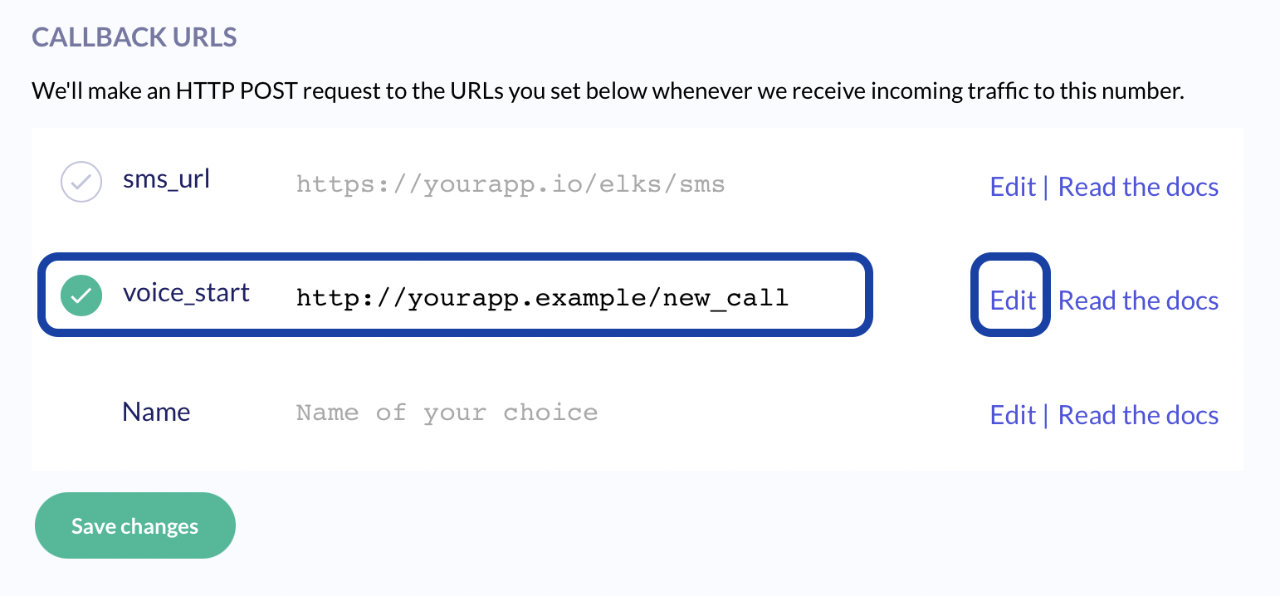
You should have gotten a telephone number automatically when creating your 46elks account through the registration link on this page.
- Click edit next to your virtual number.

- Click edit next to
voice_startto edit the URL, and set it to.Should look something like this in your dashboard
Because of limitations by operators, you can’t call yourself from your own phone number..
So let’s set “from” to your virtual phone number for testing purposes.
You can also call your workshop neighbour to get the full experience of seeing the phone number of the person who’s calling.
-
At the top add
-
In your route add
-
Now define user and make sure the calls just not go to the same person each time
-
Then your code will look like this in full now
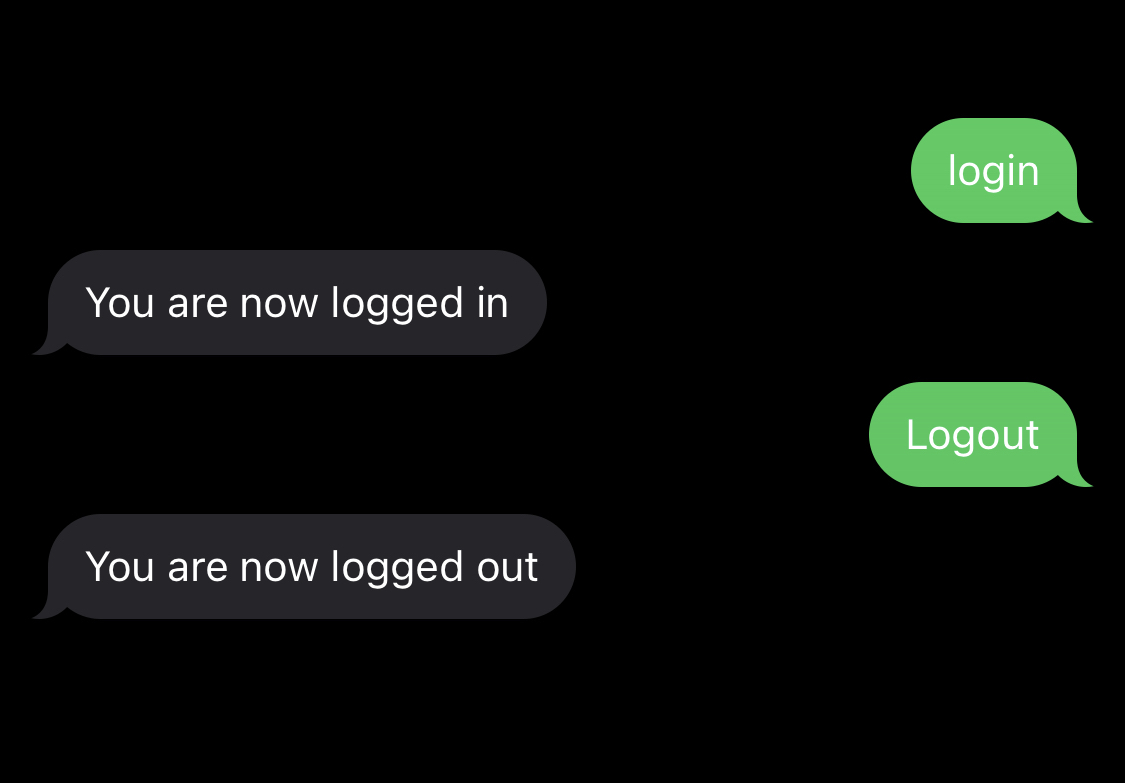
How to switch "who's it"
To let your switchboard know that you are available you need to opt-in.
To do this you simply send a SMS to your virtual number with the text "login" and "logout" depending on your choice. It works with both Upper- or lowercase.
Test your app
Ask someone (perhaps the person next to you) to call your virtual number and the call should be connected to your regular phone.
What now?
This switchboard can be extended with other functionalities based on your needs.
Here are a couple of suggestions on how you can adjust your new switchboard:
- Set up an answering machine that is adjustable. Here's also have video tutorial for that.
- Set up an IVR that will be able to forward the incoming call to a specific person in your team based on the caller's need.
- In case you have sensitive arrends at your company you might have to be able to record the call and save the audio file.
- If no one is available to take the call, send an automatic email or SMS with the information about the missed call to the team to remind you to call the customer later.
- If you want everyone at the company to be able to adjust your switchboards audio files, then it's easy to import them directly from Dropbox and use them in your switchboard. Perfect for that spontaneous team meeting!
The full code is here in case something happened to yours on the way


